Aries Mar 21 − Apr 19 Alias: Alias: The Ram June 27 (27/06) daily aries horoscope: summary aries daily Star 7/10 If youre feeling any tension in any area of your world, then it could be intensified now. Whats likely needed on your part is a preventative measure to keep a certain tense scenario from escalating. The only effort this requires from you is a willingness to speak openly and honestly. If any issue or topics are left to remain concealed, then theyll emerge with a vengeance later. Read more... summary aries tomorrow Star 7/10 A growing sense of instability could cause you to wonder if its safest to remain focused on the past or taking a risk in some way might be what feelings of uncertainty are encouraging you to do. An issue surrounding loyalty toward an individual or or...


Natalie Swinson
A healthy start to my day
Since receiving this, I have made a breakfast sandwich every day (for a couple of months now) and I LOVE it! My kids have opted a healthy breakfast sandwich over their usual choice of sugary cereals too much of the time so that’s a huge plus. SO much better tasting than the (albeit convenient) pre-made frozen ones you pop in the microwave. You control the ingredients (ex. whole grain English muffin, turkey sausage or ham, egg whites, or a low fat cheese...etc. versus the the less healthy alternatives). It takes literally 5 minutes to produce the breakfast sandwich of your choice from start to finish and the clean up is a breeze, usually an easy wipe down is all that’s needed. No lie, super easy. So, yesterday...after contemplating what to do with a good amount of mashed potatoes I had left over, I decided to see how well some savory potato cakes would hold up in this breakfast sandwich maker. I can say that they turned out beautifully and so much better uniformed than those made on the stove. Whether you’re making the purposeful breakfast sandwich, or the occasional experimental pancake of sorts, this appliance is a handy tool in the kitchen. I’ve been very pleased with its daily performance.
Missy Childers
The answer is yes.
FAM. I need you to lissssssen. I would give this product 87 stars if I could. This thing was delivered to my doorstep in two business days, and will provide a lifetime of joy for me. You'd think it would be one of those gimmicky kitchen appliances that barely even works. EXCEPT you're wrong. It's amazing. It's quick. Look. Lissssen. You put the ingredients in and about two minutes later your tummy is all like "oh yesssss." Basically. Just buy it. Purchase the sammich maker. You're welcome.
Dawn Miller
Delicious, fast, easy, healthy! GF/Paleo/Low-Carb Too!
We bought this in July 2016 and I am updating my review in Feb 2017 to say that we are still happy with this and use it an average of 3x a week, sometimes a lot more. Worth it! I did not want another weird specialty kitchen appliances that would be used a little and then take up cabinet space. However, my husband would eat frozen Jimmy Dean breakfast sandwiches daily which are expensive and full of bad ingredients. After over a month of indecision I finally bought it for him, but it has been great for the entire family. It's about the size of a toaster and stores easily. Delicious! It's been great! My husband uses it to make his breakfast sandwiches (with all natural ingredients) for a portion of the price. My 4 and 2 year olds love the sandwiches too. We make lunch sandwiches like grilled cheese and turkey. I even make paleo/gluten free friendly versions. Make 2 eggs and veggies sandwiches and a sausage patty in between. Fast! It only takes a few minutes and it's really easy to clean up. We even prep our food for the week by putting one egg in a 1 c tupperware with any veggies (or not) that we want. Then each morning we just pull out the food, pour it in the sandwich maker, set the timer and walk away. Less than minutes later we have a delicious perfectly cooked breakfast. Easy! The clean up is really easy too. Just remove the rings and wash them with soap. I carefully put the sandwich maker in the sink and wash the inside with a soapy sponge, then carefully rinse it, and set it on a towel to dry. Just like I do with my waffle maker. Healthy! This has been a great alternative to the frozen breakfast sandwiches. We use real, fresh, natural ingredients. We love this!
Anna Garcia
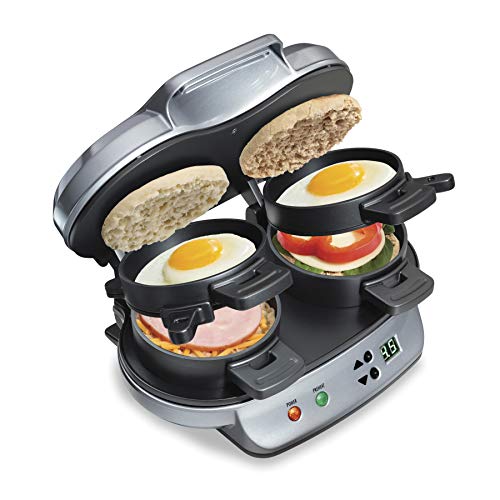
This should be in your kitchen!
Got this for my husband for Christmas. BELIEVE ME... you need this! We make all sorts of things with it, even pizzas!
Katelyn G Irwin
Works very well, lacks in flavor. I'll explain...
Bought this with low expectations. Pleasantly surprised how well it works. Using basic English muffins, regular Large whole egg, sliced cheese, precut Canadian bacon or sliced deli ham comes out very hot at 3mins. 3mins seems to be about perfect. Egg is fully cooked but not over. The big difference is taste and crispyness. Unlike making this traditionally, it lacks flavor. Typically this made at home would be multiple steps. Muffins would be toasted then buttered. Egg would be cooked in a frying pan seasoned to taste. The meat, cheese etc would just be added at assembly for the most part. So the only way I've found to use cooker to get better results are to pretoast and butter the muffins and season the egg directly after it's cracked on the cooker. If you like muffins or bagels hot but not toasted than this works very well. Clean up is very easy. The nonstick coating is very good on this thing.
Nerwin De Vera
So easy. Possibilities are endless
We spent one morning experimenting. Here's what we found. The best bread to use is the English muffins. Crossiants will burn if cooked too long or if machine was already used and is still very hot. Solution; allowed about 5 minutes of cooling time before making another batch. Also, one batch we used scrambled eggs. Allowed the eggs to cook for 2 minutes before adding top crossiants. Next batch for poached egg, allowed egg to cook for 3 minutes before adding tops. Crossiants cooking time for crisp light non burnt was 4 minutes. Used pre-sliced sourdough bread sliced in half. Did same as above; allowed eggs to cook first then added tops. Perfectly toasted hot sandwiches. Meats used were frozen sausages and ham. We put the sausages in the microwave for 30 seconds to thaw. They were links so used 2 and cut them in half to make 4 halves; fit perfectly. Used fresh sliced deli ham folded in half. Cheeses used; sliced Kraft American singles and Tillamook sliced Swiss. The corners of the cheese stick out a tiny bit and ooze over the edge, but stay on the machine, nothing leaks on to counters. We mixed and matched all breads, meats, & cheeses. Only a couple of fails with cooking times, but most worked great and fun for the kids to help out with the experiment. The easiest bread is the English muffins. No need to allow egg to cook before adding the tops; just throw it all in. Best tasting was the crossiants with scrambled egg, ham, and Swiss. Yum! And the sourdough slices toast real nice. Also did a sourdough sliced, thin slice of mozzarella, thin slice of tomato, sprinkled some basil--no egg (just left the egg dividers open). Was a nice little snack. Would probably be better with bacon and avocado. :). Clean up is a breeze. The cups lift right out; put them in a bowl of hot soapy water for literally a minute, rinsed and dried. Used a warm wash cloth to wipe away crumbs and melted on cheese from the machine, came right off, no scrubbing.
Lonnie Heath
Yummy!!!
I am actually excited for my weekday breakfast now. These homemade mcmuffins are so good! My favorite version uses sliced tomatoes, Swiss cheese, and precooked bacon (from Costco- only 40 calories per slice). So many options, so easy! My kindergartener and my teenager both love it. I wish it came in a four count; I may have to buy another one for our family. It's also easy to clean with a quick wipe down.
Wanda Dodge
Danged clever gadget!
I'm gadget-crazy and bought this on a whim, and I'm pretty impressed. I read Nick's review several times and took all of his advice. Suggest all new owners do this. My sandwich came out perfect the very first time! I used Pam spray, English muffins, ham, cheese, and an egg. Heated it up a little past the recommended time. Set a timer for five minutes. Used tongs to lift up the compartments and whaddya know! A perfect, cute little sandwich! I pulled it out with a plastic spatula and set it on a tiny cookie rack to cool so the bottom wouldn't get soggy. Nothing leaked, nothing stuck. Very compact and tidy. Let the contraption cool, then rinse and wipe. The booklet that came with the thing suggested using frozen pancakes from the supermarket as the "bread." I bought some frozen waffles instead and plan to try them tomorrow--I'll have to trim them a little as their diameter is slightly larger than the cooking compartment. I'm thinking waffles, bacon or ham, thinly sliced apple, cheese, and an egg (or not). Or kaiser roll, corned beef, swiss cheese, and some sauerkraut for an nice Reuben. Or just cheese, apple, and onion, on a bagel. UPDATE- Dec 19, 2013. I'M SO FREAKING CLEVER!! I made my sandwich this morning using frozen waffles. Hehe. The waffles were a l-e-e-e-e-t-l-e bit too big to fit in the compartments, so I trimmed the edge with a pair of scissors. Then (this is the really good part!) I took the cut-off edge and lined the sides of the egg compartment, so when I broke the egg in there, the rim of waffle material contained it. SO CLEVER! (Feel free to notify the Nobel Prize Committee.) I put waffle on the bottom, a slice of cheese, a thin piece of ham folded over a schmear of apricot jam (those who don't like to mix their sweets and their savories can just gag and move on), then the egg in its compartment lined with waffle material, topped with the second waffle. Five minutes cooked everything nicely. I removed the sandwich and put it on a small rack over a paper plate to cool off. By the time I finished my morning tasks, it was ready to eat. If precise timing is of the essence, suggest you set your timer for 4:30, to give yourself 30 seconds to run from the far corners of the house to rescue your sandwich. Five minutes was the outside limit to keep from over-browning the waffle. With an English muffin, it doesn't matter so much as they are made of sturdier stuff.
Carolyn Sproles
The perfect breakfast sandwich (video included)
5:15 0:00 This video is not intended for all audiences. What date were you born? JanuaryFebruaryMarchAprilMayJuneJulyAugustSeptemberOctoberNovemberDecember12345678910111213141516171819202122232425262728293031201920182017201620152014201320122011201020092008200720062005200420032002200120001999199819971996199519941993199219911990198919881987198619851984198319821981198019791978197719761975197419731972197119701969196819671966196519641963196219611960195919581957195619551954195319521951195019491948194719461945194419431942194119401939193819371936193519341933193219311930192919281927192619251924192319221921192019191918191719161915191419131912191119101909190819071906190519041903190219011900 Submit Adobe Flash Player is required to watch this video. Install Flash Player I've been using this breakfast sandwich maker for over a year, and I really do love it. Whenever family or friends visit and happen to spend the night, they all ask me for breakfast sandwiches the next morning because they know how great they are. I will say, however, that there are some tricks to really getting the ultimate experience with this maker. Lucky for you, I've made a video to share all I've learned from my trial and errors, so you can go straight from unboxing to impressing yourself and your friends with the perfect breakfast sandwich! Hope you're able to enjoy this little maker as much as my family does. PS. If you'd like to learn how to make the perfect breakfast burrito, visit this link: https://www.amazon.com/review/R6RPB47QEZN10/ref=cm_cr_rdp_perm
Dawn Phillips
Perfect sandwich cooker... Here's some troubleshooting for dummies...
Cooks egg sandwiches perfectly and easily! After reading reviews of some people that gave it a low rating of think it is user error more than the sandwich maker itself. Here are some tips: The handles clearly say 'hot'... So use an oven mit to open the handle once it is done cooking.... Egg not cooking the whole way through? Break the yolk and don't overload it with toppings! That's your issue. Wait for it to completely cool before cleaning... The egg residue should peel right off. And for the people that whined about the order of the egg, meat, and cheese not being like a McDonald's Egg McMuffin...flip your bread order. It's that simple. See attached photo... Geez. Reviewers these days can be so dumb! Use your brain :)